Adding and editing reservations
In this chapter, you can learn we how to add and edit a reservation. Since the two processes are similar and use the same interface, they are described together.
1. Prerequisites
Before you can create a reservation, an address must exist. To edit a reservation, it must be created beforehand.
2. The process
2.1 How to open the reservation form
There are several ways to open the form for creating or editing a reservation.
To create a reservation, you can proceed as follows:
- Starting from the reservation plan:
- Create a new reservation after choosing an address or creating a new address.
- Right-click on a reservation and select “Add new reservation.”
- Right-click on a reservation and select “Copy reservation.”
- Starting from the address section:
- Click on the “reservation” icon. In case there are no reservations yet for the address, the form to create a new one will automatically open.
- Starting from the reservations section:
- Create a new reservation starting from an existing reservation.
- Copy an existing reservation.
You can edit a reservation as follows:
- In the reservation plan, right-click on a reservation and select “Edit reservation.”
- In the reservations section, click on the icon “edit reservation”.
By right-clicking on a reservation with different billing and reservation addresses and choosing “Add new reservation,” the two addresses are also taken into the new reservation.
2.2 The “New Reservation / Edit Reservation” form
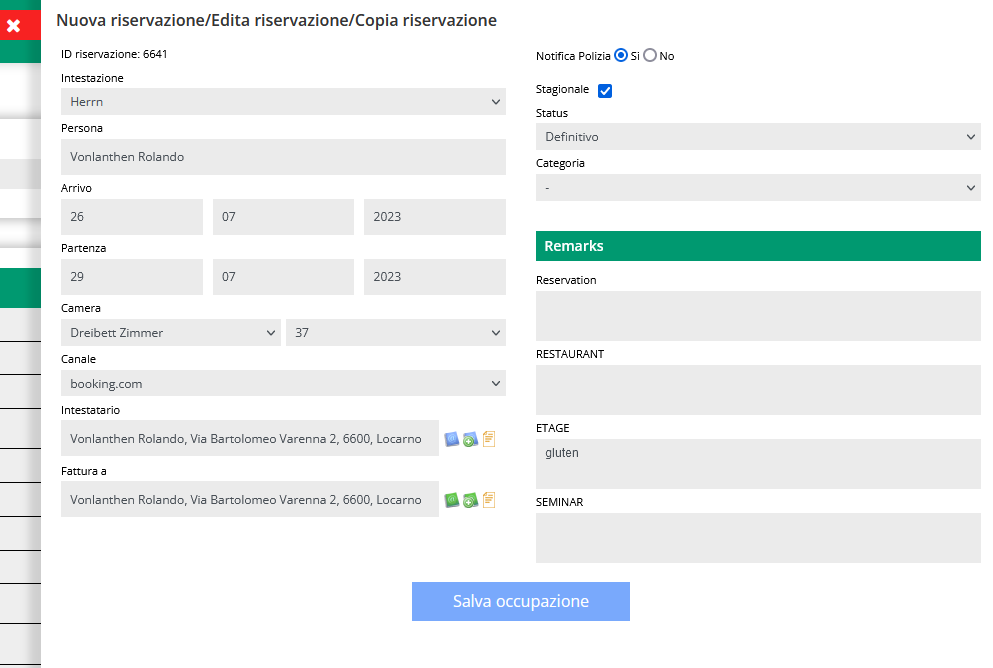
There are several fields in the “New Reservation / Edit Reservation” form:
- Reservation ID: this is a unique reservation number assigned by the system to identify each reservation.
- Title: the guest’s title.
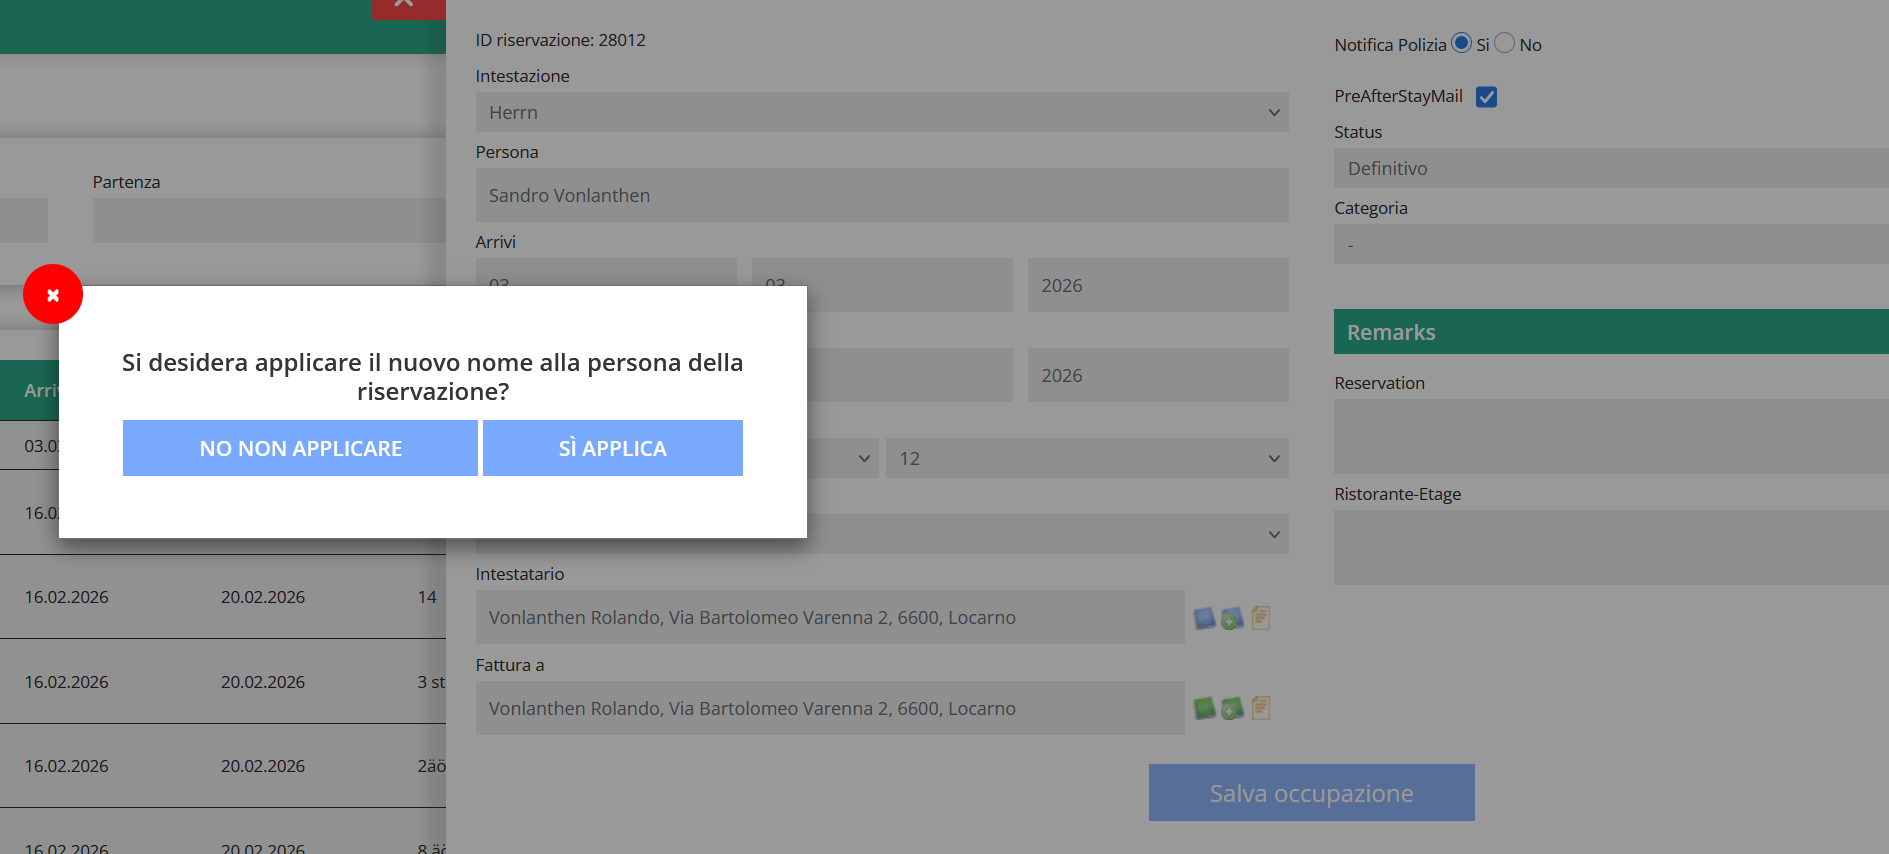
- Person: the guest’s name. Changing the name won’t impact the original address or the billing recipient.
- Total Arrival: the reservations’s arrival date.
- Total Departure: the reservation’s departure date.
- Room: There are 2 fields to fill in.
- The first indicates the room category. This allows you to limit the number of rooms shown in the second field.
- The second indicates the room number. If you are creating a new reservation, you can select a room here. Rooms that are already occupied during the chosen dates are shown in red.

- Channel: The field shows from which channel the reservation entered. The options are customisable.
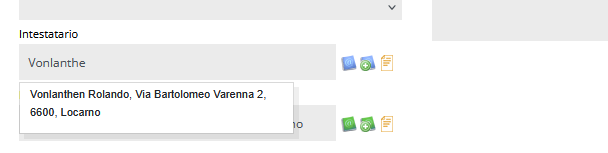
- Header: This is the address of the person to whom the reservation is linked. To change it, you can proceed in several ways:
- To search for an address that is already in the database, click on the header field and enter the first letters of the first or last name of the person you want to find. CASY will show you the addresses that are already in the database, from which you can choose the correct one.

- To edit the linked address, click on the blue icon. Read more
- To enter a new address that is not yet in the database, click on the blue icon with the +. Read more
- To see all reservations linked to the address, click on the yellow icon.
- To search for an address that is already in the database, click on the header field and enter the first letters of the first or last name of the person you want to find. CASY will show you the addresses that are already in the database, from which you can choose the correct one.
- Invoiced person: This is the address to which the reservation will be billed. This may differ from the reservation (for example, in the case of a company). To change it, you can proceed in several ways:
- To search for an address that is already in the database, click on the invoiced person field and enter the first letters of the first or last name of the person you want to find. CASY will show you the addresses that are already in the database, from which you can choose the correct one.
- To edit the linked address, click on the green icon. Read more
- To enter a new address that is not yet in the database, click on the green icon with the +. Read more
- To see all reservations linked to the address, click on the yellow icon.
- Notify: here you can indicate whether the reservation should appear in the list of police notifications.
- Newsletter: customisable field.
- Reservation status: more information
- Reservation type: more information
- Remarks (Remarks): Several types of remarks can be defined during installation.
For example:- Online Booking
- Restaurant
- Housekeeping
Once the fields are filled in or edited, you can save the reservation with the “Reservation Save” button.
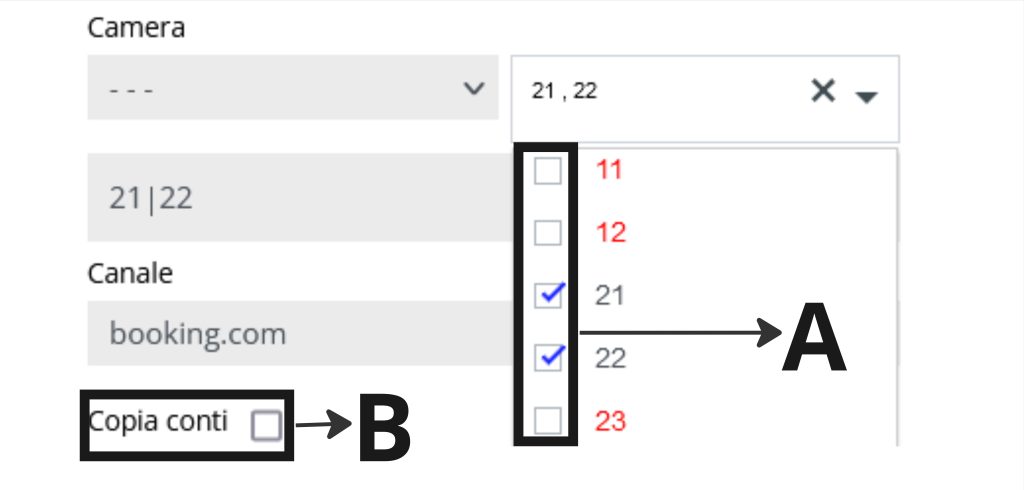
2.3 Copy a reservation
When copying a reservation, the display is similar to the one described in chapter 2.2.
There are only three differences:
- The reservation dates are also copied.
- Multiple rooms can be selected at the same time. This can be useful for group reservations, for example. (A)
- Accounts can also be copied by checking the corresponding box. (B)
2.4 Change the address of the reservation
If you wish to change the address associated with a reservation, follow these steps:
- Click on the pencil icon next to the reservation for which you want to change the address.

- Edit the Header (1) and Invoiced Person (2) fields by entering the desired address.
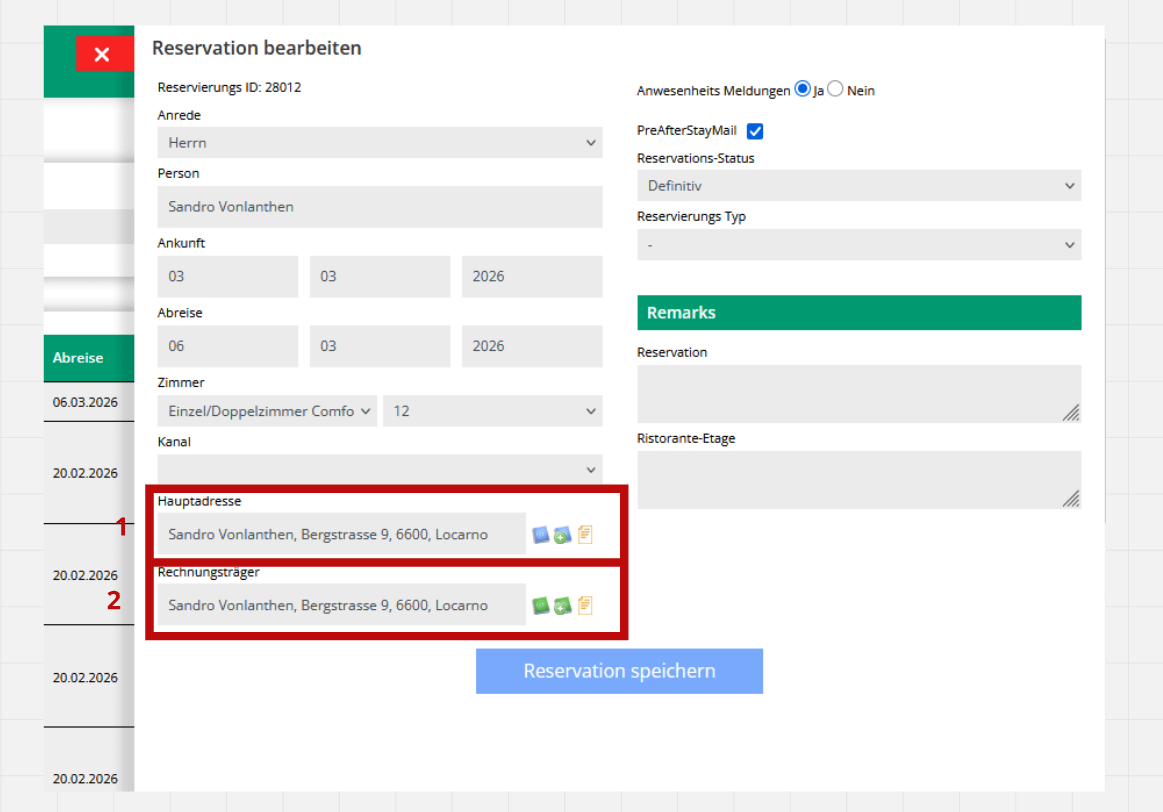
- If the address is already in CASY, you can look it up directly.
- If it is a new address, click on the dedicated icon to add one.

A window will appear to enter a new address.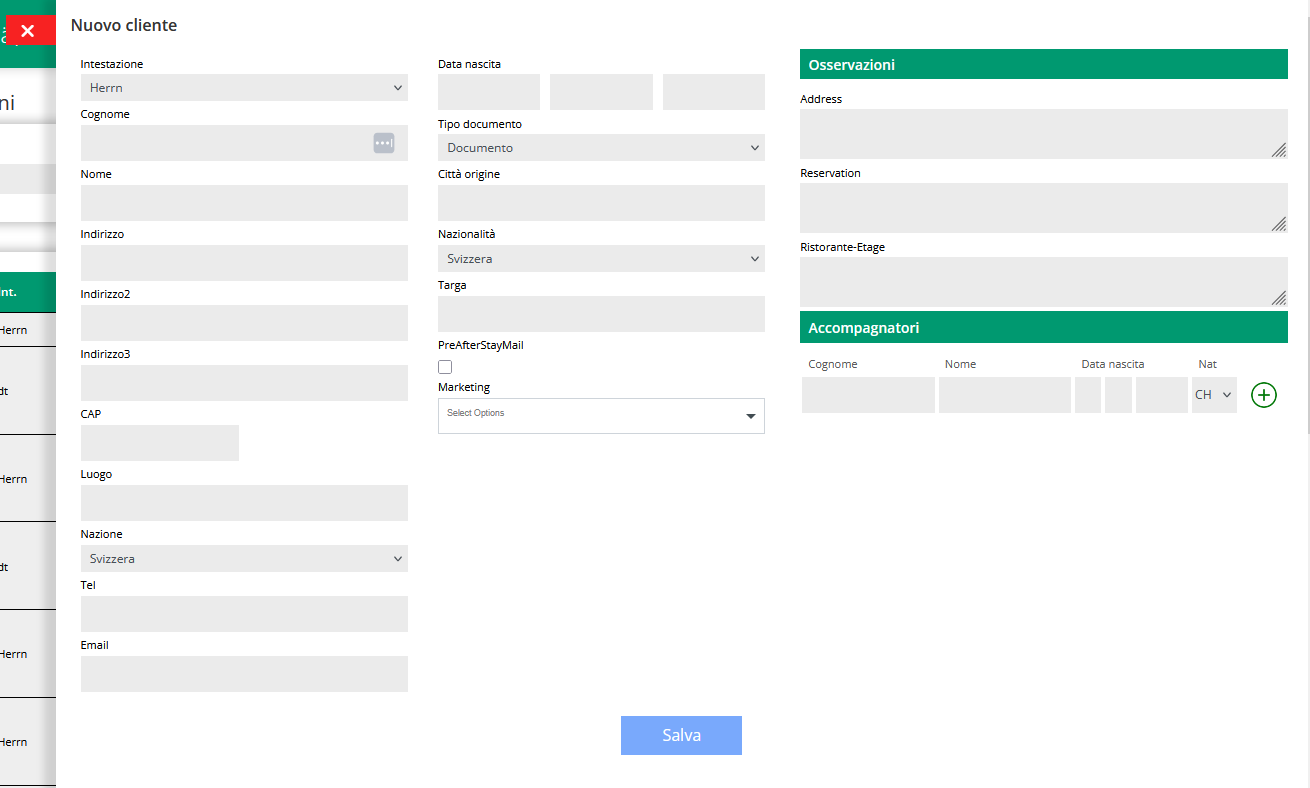
Important note: If you add an address via the Letterhead field, you do not need to recreate it for Invoice as well; just look for it among the addresses you already have.
- If the address is already in CASY, you can look it up directly.
- To apply the changes, click the Save button and confirm the change of addresses.
! Careful!
it is necessary to search for the address using the search function and then apply it to the fields; copying and pasting the address text manually is not sufficient.